Thursday, September 25, 2025

Paper Towel Holder

I've mentioned on other occasions that I have a summer weekend party I travel to. My friends who hold this party put a lot of effort into hosting over 20 people for a long weekend. As such I like to give back when and where I can.

We took a brief hiatus during the first year of Covid; however, after the vaccines had been released they started holding the party again but with new health screening rules. One of the small changes they've made to help everyone stay healthy is that they've replaced the cloth hand towels in their bathrooms with paper disposable ones.

I was doing a flurry of woodworking this spring and was already pretty busy; however, I thought I could squeeze in one more thing. I thought it would be nice if they had a custom wall-hung box to put these into. Looking through my scrap I found the perfect piece of 5/4 cherry that was an offcut from making the panels for my filing cabinet.

The scrap - and the panels - were going to be to wide for my band saw so I started by ripping them on my table saw and finished the cut with a Ryoba saw. The resulting panels were flat enough that I didn't need to run them through the jointer to flatten them. I was able to just run then through my planer to get them flat enough and thin enough to make a box out of them.

Now...  I wanted to make a continuous grain box as I thought it would look better. Unfortunately that perfect piece of cherry was just a little too short. About 1/4". It would have been nice and good practice but no one other than me is ever going to notice so it'll be fine.

After getting the boards thicknessed I used my new miter sled to cut my miters.


With the miters cut I glued it into an open ended box. I mostly used blue painters tape to clamp the corners but since the wood wasn't perfectly flat - it was pretty flat, just not perfect - I needed to use a couple of F-clamps to pull it into shape.


I let the glue dry at least overnight then setting my table saw to about the same angle as the Kleenex(tm) box I cut the bottom off. After removing the bottom I cut slots for and glued splines into the corners.


After letting the glue dry overnight I used a flush cut saw to trim the splines. I used some other scrap to make the bottom with an opening to pull the towels through. Rather than gluing up a panel and then cutting the hole out I instead just glued up 4 pieces leaving a gap in the middle. 

This was glued to the bottom of the box again using blue painters tape as a clamp.


The bottom was just a hair oversized. I cleaned it up with a block plane.

I made a simple top with a chamfered edge. It has cleats on the bottom that keep it from just sliding off but otherwise it is just held in place with gravity. To hang the box on the wall I put two keyhole slots on the back near the top. To help "lock" it into place I added a single centered hole in the back near the bottom that can be accessed through the towel access hole.


The above picture is from my workshop before I added finish.


And mounted in my friend's powder room. The vase was their addition and I think it really adds to the beauty of the piece.


This was a fun quick project and while I didn't have enough material to properly wrap the grain around the box I am still very happy with how it came out.


Sunday, July 27, 2025

Phone Stands

 Since I didn't have enough going on this spring I made some phone stands. This is such an easy/simple project it went quick and I didn't get a lot of photos of the construction.


These were the prototypes...  I was working from a plan but I wanted to figure out how to make them quickly and safely. 

The faces were pretty easy. I just milled the wood down the right thickness and ripped it to length. After that it was just a matter of marking where to drill the hole for the cord cutout on the bottom, trimming the slot on the band saw and rounding the top corners over with a template and a router bit.

The curved back was actually a little more of a challenge. I created a template out of 1/4" plywood, used it to trace a shape, then rough cut them on the band saw. I then tried using the template and a spiral compression router bit to remove the excess wood but the end grain kept grabbing and making it dangerous.

Since I was in a hurry - and I wanted to keep my fingers - I instead used my stationary sander. It made a lot of dust but it went pretty quickly to sand each block to the line.

The only other steps were to cut little blocks to rest the phone on, routing a 1/8" round over on the back brace, and then lots of sanding to get all the milling and sanding marks off.

To be able to finish these quickly and so I could get finish on the bottom I drilled a hole in the bottom and attached a truss screw so I could hang them from my finishing tree with a loop of bank line.


In this case I used General Finishes water based polyurethane. I don't use a lot of water based poly so this was a good opportunity to practice. If you look closely at the above photo you can also see that I wrote the name of the wood on the bottom.

I know what each species is; however, since I am planning on giving these away as gifts I wanted the new owner to be able to know what they had.

And here they are with finish.


Left to right it is 4x soft maple, cherry, sapele, and cherry.

These plans came from Wood magazine and are available on their store.

All in all these were a fun one day project (not counting finishing). I'm a little disappointed in the quality of finish I got; however, it is good enough for a free gift. I'll probably make some more and see if I can refine my finishing technique on them.

Saturday, July 26, 2025

Refurbished Gaming Table

Every 4th of July I travel to New Jersey to participate in a weekend long board game party at a friend's house. We'll call him Andy to preserve his anonymity Board games need tables to play on and a couple of other projects of mine have made it to his house. (See my pages of Projects for Friends)

The tables we have available for gaming at Andy's house is a relatively large dining room table, a large 4 ft x 8 ft table I gave him years ago, and some wobbly folding tables. I'd brought him a smaller table 2-1/2 ft x 4 ft a few years ago. After I refinished it it was a nice table it was a little small for almost all board games. Regardless, his wife took the table for her hobbies.

I had plans to build Andy a new table. It was going to be 3 ft x 5ft. Moreover I was going to cover the top of the table with epoxy. No, not a river table...  I wanted to make the table as an homage to all the board games we've all played over the years. My idea was to take old board game pieces and seal them under a layer of epoxy.

Then last summer while walking my dog I saw another table out on the curb. I happened to know the people who lived in the house as they had a dog that came to our puppy play dates. After contacting them and making sure they were actually throwing it out I collected it and stored it in my basement over the winter.

This spring after finishing my filing cabinet I needed something a little more simple and after doing the math I figured I had enough time to strip and refinish the table before my 4th of July trip this year.

On close inspection the top was in very bad shape. It looked like the table had been left out in the sun and rain for a long time. There were also gouges in the surface that looked like a child had been using it as a workbench. The legs were painted and generally in much better shape.

To me this was perfect. I was not going to be able to get the 1/8" deep gouges out of the top to make it a "good" table again but if I was going to cover it with maps and other game pieces it wouldn't matter.

So, I removed the apron pieces and pulled it out into my driveway to strip the old finish using a random orbit sander and 60 grit sandpaper.

Before

After

It took about four hours to strip the old finish. The edges had cracks and mold stains so I ripped about 1/2" from all the sides then used my router to round the corners then put a 1/2" round over on the top edge and a 1/8" on the bottom edges.

The next step for the top was to apply a dark walnut stain. The base wood used in this table was not terribly attractive by itself and the darker stain also helped hide water stains from being left outside.


I then found the game pieces I had been saving for this purpose and laid them out to find a good looking combination. This next one was my favorite. It was a very charismatic map and with the cheat sheets next to it it almost looked like someone was playing a game.


Unfortunately there was one problem.


The table had a severe cup in the top probably from being left outside in the rain and the sun. I tried adding a couple of battens to the bottom to flatted it out; however, they were not enough. Since the epoxy is self leveling it would all have just pooled in the middle of the table and been a mess.

So I fell back to plan B which was to just put polyurethane on the top and call it done. I used my normal General Finishes Oil and Urethane diluted with mineral spirits on about a 4:1 ratio that I then wiped on.

To finish the legs I scuff sanded all of them and whenever I found loose paint I sanded to bare wood. I then repainted them with rattle can Krylon Glossy Ink, a very nice dark blue. A picture of the first coat is all I have of refinishing the legs and aprons.


And here it is in situ all finished. The legs did get dinged up a little bit in the drive down. I'd thought I'd wrapped them in towels well enough but I must have missed a spot. Regardless the table is going to look good from my house in Western NY and I think became a new favorite gaming table for everyone attending.


Small Boxes

I have some special wood I told my wife I would make her a box out of. I figured before I tried making a fancy box that I could use some practice making small boxes to work through any issues or skill gaps.

I started by watching several videos on making small boxes and settled on making one based on one based on the design by Quill Woodworks.

I started by ripping strips off a scrap of 8/4 flat sawn walnut. I marked the strips as I ripped them so I could keep adjacent strips. Using adjacent strips I will be able to "wrap" the grain around the box.

I built a new 45 degree sled for my table saw. I set the blade to 44.8 degrees so if there are any gaps they will be on the inside vs the outside of the miter joint. Using a stop block I could make sure the parallel sides were of equal length.


As you can see, from the below picture I marked all the pieces with white pencil to make sure I could keep them all together in the correct order.


After cutting the strips to length on the miter sled I cut rabbets in the top and bottom edges. I then used my router table to cut the notch to hold the top open (watch the video for details).

I had strips that were not usable for sides so I glued them together to make bottoms for the boxed.

After a lot of scraping and sanding I had my first box. I finished it with wipe on oil based polyurethane.


This is the only box I've finished so far. I was making these as a break while working on my filing cabinet. This one went to my friend Bonnie.

Four Drawer Filing Cabinet

I've posted about the four drawer filing cabinet I wanted to make for my office. Well, I finally made it a reality this last winter.

I had a plan. No really...  I had a plan.

My plan was to use some free rough sawn air dried soft maple that I acquired a few years ago from a coworker who was moving out of town and was leaving his woodworking behind. He'd tried selling it and had no takers so he gave it to me.

The second part of my plan was to spend the last week of December 2024 and see if I couldn't finish a large project in a single week. (hint: I couldn't)

I started by rough milling the soft maple. What I ended up with was a pile of disappointing looking wood. The first couple of pieces I'd pulled out last summer was a pretty brown and slightly spalted (blues and pinks) color. A large portion of what I had turned out to be kind of ugly and whatever spalting that was there just looked like black mold..

I thought long and hard about it. Then for giggles I checked how much it would cost to buy lumber. Turned out I could build the entire filing cabinet for just over $200 in cherry. I've always loved cherry but in the beginning of my woodworking hobby cherry was the expensive wood and walnut was less expensive. Now it's the opposite.

I did finish milling the soft maple so it will be readily usable for another project but then I ran out to the lumberyard and picked out several nice cherry boards and brought them home.


Construction of the filing cabinet was relatively typical. The one thing I did different from other cabinet projects is that I built the drawers first. Typically the size of drawers isn't the critical dimension. If your sock drawer is 1/8" wider or deeper you aren't going to notice. However, since my drawers needed to hold a specific dimension of hanging file they were made a bit earlier in the process.

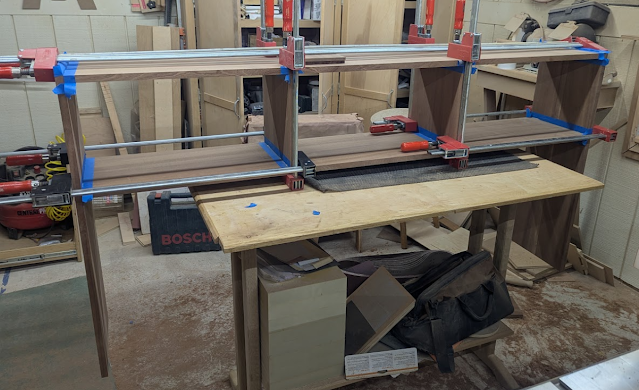
But, I am getting a little ahead of myself. My first step was to rip some book-matched boards out of some 5/4 cherry for the panels in the sides of the cabinet. These were critical path because I needed to get them finished before I could start assembling the sides. 

I did use 5/4 for two 1/4" thick panels. I'll admit I did it because I'm not good at resawing on the bandsaw and I didn't want to risk too thin panels from a 4/4 board. Of course then I decided to leave them extra wide (i.e. wider than 6") and they were beyond the capacity of my 14" bandsaw. So I ended up using a rip blade on my table saw and then used a ryoba pull saw to finish.

In the interest of time I cheated a little. I didn't bother sanding the faces of the panels that would end up being on the inside. This "sacrifice" saved me a couple of hours of sanding plus when I was applying the finish - to both sides - I didn't need to be precious about the inside faces. This made applying finish easier too. I also left witness marks on the inside faces so I could keep the parts organized.

While the oversized panels were in my finishing room I built the drawers. Their dimensions were set by the size of a US legal sized hanging folder. This defined the width between the rails (sides) and height. The drawer depth was defined by how deep my filing cabinet was going to be. From this I created a cutting diagram and cut out the drawers pieces.


There are a lot of ways to build drawers; however, since I was planning on filling these with 50lbs or more of paper per drawer I wanted them to be as strong as I could make them while still being cost effective. My favorite way of building drawers is out of 1/2" plywood including the bottoms. It is relatively dimensionally stable and plenty strong. 

I know a lot of people might just use a butt joint and some brad nails; however, I prefer tongue and dado joinery. It doesn't take a lot of time to set up a 1/4" dado blade, cut all the dados and grooves, then come back and make the mating tongues. It gives me increased gluing surface as well as joints that will help align the pieces and keep everything square.

One choice I did regret was using Sande plywood from my local big box store. It was less expensive than birch plywood from my hardwood supplier but it was also not the best plywood. It had voids and was soft enough that when I made some jigs out of the offcuts screws would rip right through it. Though, I think it will be fine for this purpose. 

I did finish building the drawers with what I had because I didn't have anything else. I figure if they ever start falling apart I can rebuild them then. It's an experiment. Living, learning, and growing.


Here's a mockup of how I did the rails. They're basically 1/2"x1/2" angle aluminum that I screwed into the tops of the drawer sides. So far they are working great and I have no complaints.


With the drawer boxes complete I started working on milling the lumber for the drawer faces as they were going to need to be glued up out of multiple pieces and the rails and stiles for the sides.


Unfortunately, this was where my week of PTO ran out. It was January 2nd. My finishing room needed to be reverted to an office and I had not really started on the case work yet. Things were already not going at a breakneck pace but I needed to go back to my day job. However, by the end of January I had managed to get the side panels assembled.


Yes, I saw the staining at one end of those panels. I'd already cut my board to rough length and couldn't use the other end. As discussed earlier, this is not the first of the compromises I made for this piece of furniture.

Once the glue dried on the side panels my next step was to start cutting the joinery. I'd had a lot of different ideas for how to fasten the rails between the sides. I'd even considered using sliding dovetails to get additional mechanical strength. In the end I decided to just use shallow 1/4" mortises in the sides and stub tenons on the rails.

To get some level of accuracy I first calculated, then re-calculated, then sanity checked the spacing. I then did layout on the mortises. I also built a jig so I could cut them using my plunge router with a collar.


This whole project was about stretching my comfort zone. I wanted to try to build it quickly and I also wanted to try some new techniques. 

All of the cabinets I have built so far have a top that sits on top of the carcasses. This allows me to put screws in the front and screws in slots in the back to account for wood movement. The design for my filing cabinet has the top inset inside and between the two side panels. I could have just added more structure inside the case to fasten the top to; however, I decided instead to use a sliding dovetail joint. I am relying on the dovetail to hold the sides together.

For my first sliding dovetail I am satisfied. They aren't great but they're good enough for a prototype filing cabinet. I need more practice with this joint.


With all the joinery complete I could move onto glue-up. I've been dry-fitting throughout the entire project but I did do another complete one along with miming adding glue to each joint. This let me know there were going to be a couple of challenges with the glue up. 

The first was that trying to do it all in one big frenzy of gluing and clamping probably wasn't going to be a good idea. If I glued in all the rails to just one side I could take my time, at least on the first side.

The second problem was that my sliding dovetail on the top meant that I couldn't just bring the two sides together. I needed to be able to slide the top into place. The challenge with that step is that I had already fit the front lip onto the top and the top back rail would interfere with sliding the top on.

I worked around this issue by shortening the stub tenons on that one rail and with the top only partially slid into place there was enough movement to get that last rail in.

So, I glued the rails into one side using the top and the other side to make sure they were all square. After 24 hours of clamping I took the cabinet apart. Put the unglued side face down on my workbench, added glue to the mortises and tenons then with my wife's help fastened the two sides together.


Once all the glue was dry I started fitting drawers and drawer slides.


Then fitting drawer fronts...


You can see from the picture that I used playing cards to center the drawer fronts, then some truss head screws through the pre-drilled holes for the handles to hold the front in place. After the fronts were held in place I added four more screws from the inside to permanently hold the fronts in place.

I couldn't resist getting an early glimpse of what the filing cabinet would look like with hardware.


It was not April 13th and I finally got the case into my finishing room - my wife's home office. Fortunately it is well ventilated and if I applied finish right after we finished work for the day by the next morning most of the smell was gone. I also moved the cabinet into my home office for the day so new smells wouldn't be volatizing near her during the day. It was extra effort but worth it.


I finally finished it mid May. It took an evening to reattach the false fronts to the drawers, reattach all the drawer slides, and put the leveling feet on but it was finally done and tucked into a corner next to my 3d Printer.


Overall I am satisfied with this project. There are a number of things I pointed out here and a few things I didn't that could have gone better. However, my primary goal was to have a filing cabinet and I accomplished that goal. It is solid and I have no fear of it falling apart any time soon. 

I ended up needing to design my own cabinet from scratch because I could not find any plans I could buy. I found 2 drawer and desk based cabinets but not 4 drawer cabinets. I designed this cabinet based off of a broken 4 drawer filing cabinet my in-laws had. Theirs was all veneered plywood. Since I wanted to use solid wood my construction challenges would be different. If I can find the time I am going to write up these build plans for this and publish them here for free.

Sunday, November 3, 2024

Sit/Stand Office Desk


Around the same time I bought the lumber for my office bookshelf - it may have been the same trip - I bought the lumber to build a sit/stand desk. 

Back when I worked in an office I briefly had a sit stand desk in my cubicle. It was nice to be able to stand part of the day and to sit part of the day. Now that I am permanently working from home - it will be a sad day if somehow I am ever forced to return to an office - I wanted to make my office work for me.

Step one of that was to build the Slant Front Bookshelf from my prior post. Step two was to build a sit/stand desk. My requirements were:

  • I wanted a little more space than I had with my 30" x 60" metal office table
  • I wanted it to be pretty
  • I didn't want to go overboard on design and construction - no frills

The story of how this desk finally came to be is the same as my Slant Front Bookcase. In brief, shortly after buying all the supplies to build the desk we lost my father-in-law. The subsequent year and a half was busy readjusting to life helping take care of my mother-in-law.

However, after finishing my bookshelf over this summer I realized if I hurried I could finish my desk before it got too cold to use my garage as a finishing room. I double checked the weather forecast and saw a one week window where the weather would be in the 60's F.

You miss 100% of the shots you don't take so I buckled down and spent what weekend and evening time I had available to get the desk top built.


I started by milling the 5/4 Sapele boards for the desktop getting them flat and straight. After arranging them in as good of a pattern as I could I glued two up two sets of two. After letting the glue dry overnight I glued the two halves together.


Then it was two or three evenings of sanding and scraping to get the tops flat and scratch free.


I trimmed the ends with a circular saw and straight edge, then rounded the corners with a 1/2" router template, and rounded the edges with a 1/4" router bit.

A little more sanding - about and evenings worth - and dust removal and it was ready for finishing.


The finishing process took about a week. I used General Finishes Oil and Urethane thinned with mineral spirits to make it into a wiping varnish. It works well for me; however, it is slow to build. Also with the weather being cooler than optimal for curing I was giving it a full day between coats.

After letting the finish cure for about 10 more days I attached the legs and set the desk in place.


The weird thing on the wall is a temporary shelf stuck vertically in a French cleat. When I want to use my personal computer at the desk I can close the lid on my work laptop, re-orient the shelf, and use my personal laptop pretty much the same as my work one.

I had plans for building shelves but as you can see from the red leaves outside my office window we were well into fall at this point and I was afraid I wasn't going to get another span of days nice enough to do finishing.

Then, not a week later I saw four days of acceptable weather predicted in the long range forecast. I figured I may as well try to get the shelves done. Worst case I just have some wider boards sitting on my lumber rack for the winter.

The 3/4" Sapele boards I had for my shelves were long enough and wide enough that I could cut them in half and then glue them back together to make all the parts of the shelves. I raced through the milling process so I could get them glued up.


I probably should have taken a little more time with this step as I didn't get the best joints I possibly could have. However, I was able to put those parts in inconspicuous spots so I am not too worried about it.

After scraping the glue I was able to put these boards back through my planer to get them flat again. It was nice to not have to scrape them. However, sanding actually took longer. The shelves have more surface area than my desk. C'est la vie.

I built a quick straight edge for my router to make the stopped dados for the joinery. It worked great. The only failing was when I didn't clamp it down tight enough and it slipped. Fortunately I caught it before I totally ruined the side I was working on. I "fixed" it by finishing the dado I was cutting, then slid the straight edge down a little to just cut the dado a little wider.

Unfortunately this meant I had two separate setups for cutting the matching tongues but it wasn't too bad. I normally use a dado blade in my table saw but these boards were too long. I have a radial arm saw I could have used but it isn't fully set up yet. After much pondering I used my 2 HP router with a rabbeting bit to cut the tongues. I had nearly no tear out on the ends. I love working with Sapele.

I was a little nervous about cutting the middle dividers to length but I measured three or a dozen times and then cut them. I really didn't have time for teeth gnashing and just had to get it done. Fortunately, my measurements were correct and all my dry fitting showed everything was fitting well.

I spent a lot of my non-workshop time thinking about how I was going to glue up these massively long shelves considering order of operations and with what I had available in my workshop. What I ended up doing was gluing and clamping the dividers into the shelves and letting the ends hang off my outfeed/assembly table.


I wasn't excited about clamping to internal structure but I only have two of the really long k-body clamps.

I was a little worried about the weight of the sides bowing the shelves upwards while the glue was still trying so after taking these pictures I took a couple of short k-body clamps and used them to shim up the shelves at the edges of my assembly table. I don't know if it was necessary because I did it and my shelves have no bowing.

The blue tape on the joints did help. However, I also got some tape stuck in the joints. I'm not sure if I'll try it again. I had minimal squeeze out regardless and cleaning up the tape was not zero effort.

After some final finish sanding it was time for the finishing room.


After applying the same wipe on poly as I'd used on the desk I moved it inside to finish curing. I was a little afraid the shelves would beat up the relatively soft sapele of the desktop so I used some double sided tape to tape some felt to the bottom of the legs. It stuck plenty well especially considering gravity is going to help keep the two pressed together.


I'm really happy with how it came out considering the short time - for me - that I spent making it. It's somewhat basic but I don't need anything fancy. I'm kind of a utilitarian sort of guy.

As a side bonus all my measurements came out exactly right. I was a little nervous bringing the shelves and the desk together the first time but they fit with just the right amount of margin. My new desk is about a foot longer than my old desk which required moving the bookshelf over. The door opens with inches to spare. Just as I planned it.

I've only tested the standing feature of my desk once. I need to make sure my cable management is completed such that I don't pinch any cables on the window trim and I don't want to yank anything off the desk if a cable is too short. I'll get to cable management over the next month as things start settling down again.

This was a fun if somewhat rushed project.