If you only count hours in the shop I've been making good progress on the Radial Arm Saw Cart. If you go by calendar it hasn't been that great. Regardless, last weekend I got the panels shaped.
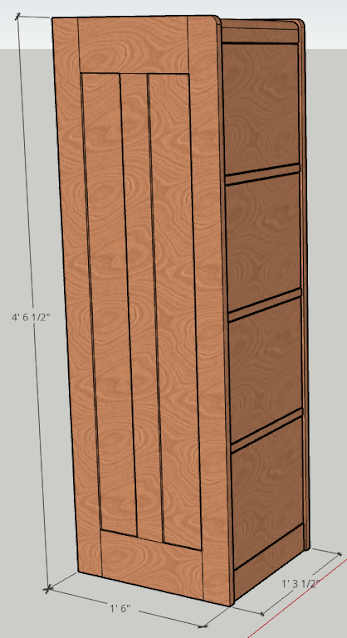
My first step was to shape the tall outer panel as seen below.
 |
| Tall Panels |
I cut the first rail slot by hand but then I got a little smarter and made a jig. I took one of the longer rail offcuts and cut it into three pieces. I then glued them back together to make a router template. To cut the rest of the slots in the panel I carefully measured, clamped the template in place, removed most of the waste with my jig saw, then trimmed to the exact size with a half inch pattern bit in my router.
I then used the first panel as a template for cutting the middle panel and the short outside panels. I used the same process. I lined up the first "template" panel on top of the other panels, removed most of the waste with my jig saw then used the half inch router pattern bit to get them exact.
 |
| Short Panels |
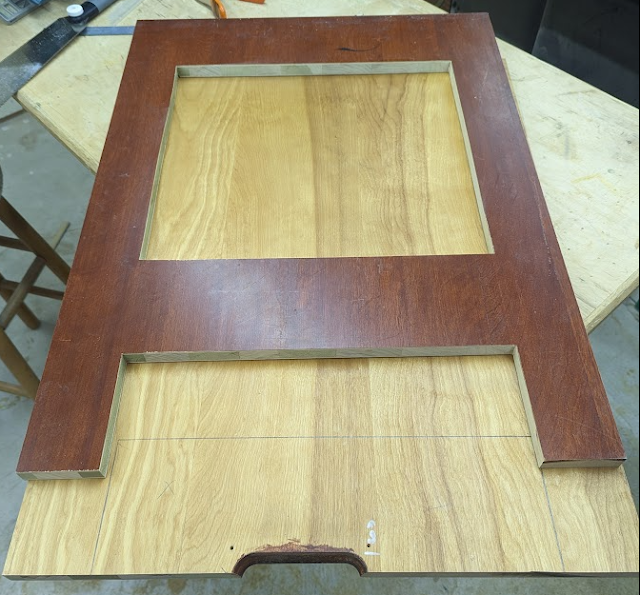
 |
| Middle Panel and extra support rail |
My first task this weekend was to drill the holes for the handles. I'd bought 1" black pipe for these and fortunately I thought to measure it. It's 1" inner diameter so the actual outer dimension was about 1-5/16". I don't have a Forstner bit that size so I just used a 1-3/8" bit. They'll be a bit loose but that's better than being too tight or not fitting at all.
Again, I carefully measured the position I wanted the holes to be on my template panel, used a center punch to mark the hole location and then drilled the hole on my drill press. It was a bit awkward because the positioning of the holes had most of the panel hanging off the table but I made it work.
After getting the holes drilled in the template panel I removed the bit from the drill press and used it and the template to mark the hole location in the middle panel. I then remounted the bit in the drill press and drilled the holes in the middle panel.
Now with all the joinery cut it was time to start gluing up the panels. I decided it would be easier to glue the center panel first. I'm not sure if I mentioned the source of these panels. In cleaning out my in-laws barn I came across a dozen prefabricated panels. They're thick veneer over a poplar core and they've been stained and have a film finish on them. To get a better chance of the glue holding everything together I'm sanding the finish off before gluing.
I sanded the back of the mid rail support and the top of the middle panel. I then spread glue by squeezing a bunch on and then spreading it with an old AAA membership card. It was when I went to apply clamps I realized my error. The little rail started sliding all over the place.
Fortunately I'd decided to buy a pin nailer over the winter and this gave me the perfect opportunity to pull it out and use it. So I quick got my compressor out and refilled, read the nailer instructions - at least enough to know what pressure to run it at and how to load nails, then pinned the board in place before adding a half dozen clamps.
I used the same process with the other two side panels but I skipped the frantic prepping the compressor and nailer step and just made sure it was ready.
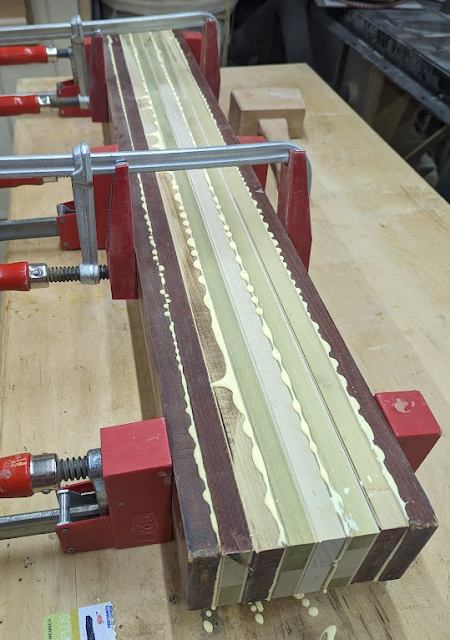
 |
| Tall side panel glue up |
I did use a lot of clamps gluing up the two side panels. I may have had the nailer ready but I didn't have any cauls ready. I did have the rails for the cart though so I used a couple of them to try to spread pressure across the panel. I noticed I didn't have any glue squeeze out on the bottom though so I took the other two rails and used them to put some pressure more in the middle of the panel. It isn't pretty but it worked.
My glue up of the short side panel went a little better as I was more prepared for the number of clamps I was going to need to use. I also used a lot less glue. The above picture of the long side panel looks like I am getting a reasonable amount of squeeze out but there was actually a lot in the middle opening.
I was interrupted by dinner and other things while gluing but that worked out well because while that isn't all my clamps, that is most of my good clamps of this size. The interruptions came at just the right time for me to let the glue dry so I could get it while it was a little tacky.
I was kind of afraid at how the panels would come out alignment wise. I didn't cut the inner panels oversized at all so if anything slipped during glue up I would have misaligned panels. Fortunately tacking them together with my pin nailer did the trick. They all look fine so I guess I got lucky.
 |
| Left to Right: Short Panel, Middle Panel, Long Panel |
Next step was to trim the panels cleaning out the rail cutouts, leg cutouts, and trimming the middle panel to length. This work was done with the jig saw, router and table saw.
My rails were unfortunately around 1/128 to tall so I ran then through the table saw shaving off a little at a time until they fit. I put a bevel on all the edges making sure to not bevel the rails where they were going to be inset into the vertical panels.
The the big glue up. I sanded the prefinished parts of the rails where they were going to be glued to the vertical panels and then carefully glued everything together.
As you can see from the above photo I needed a cross clamp to bring everything square but it was pretty close regardless. This was just making a very slight adjustment.
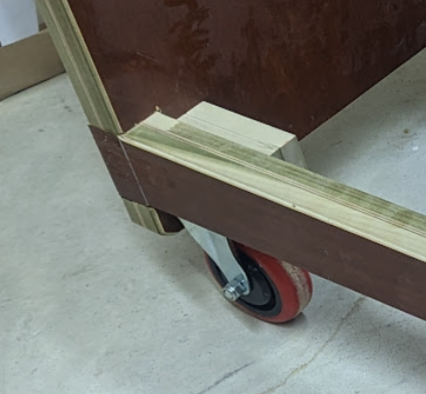
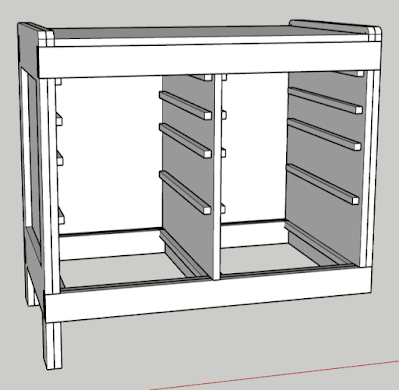
I glued up a couple of blocks to support the wheels, again sanding the finish where they were glued on. I intentionally left them a bit short of the rail so when I add drawers I'll have space to add the drawer rails.
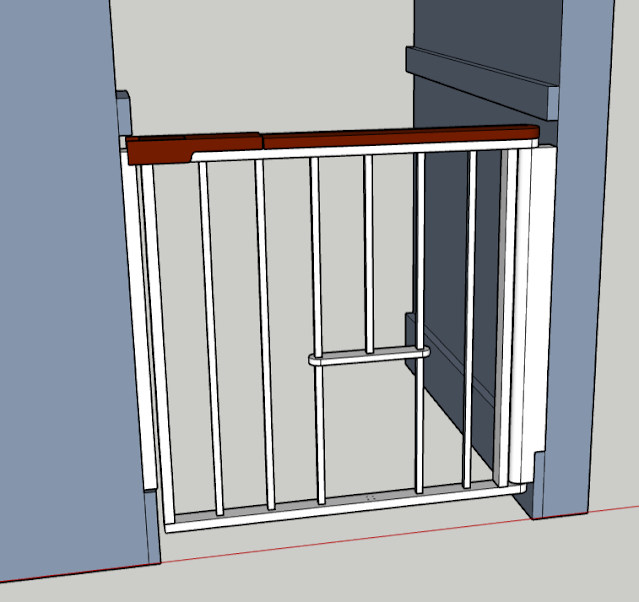
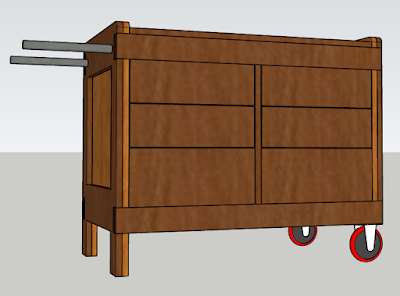
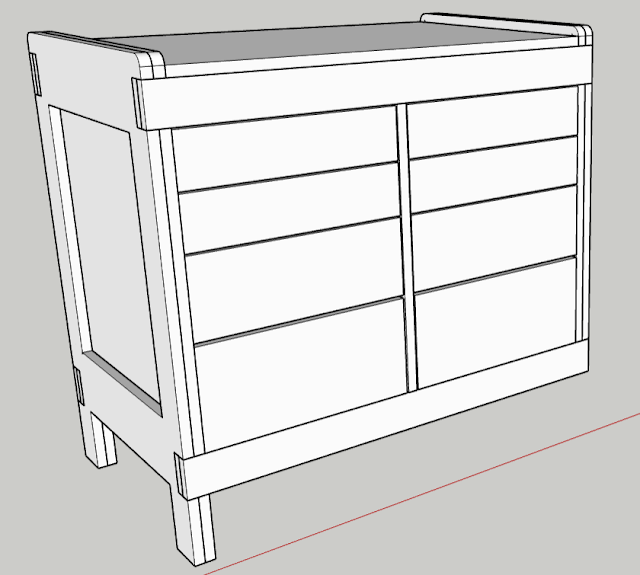
And voila, done except for drawers I will add much later and a top.
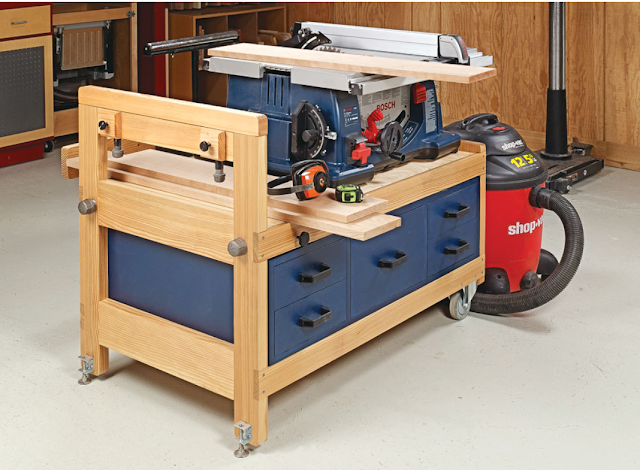
And with the top...
I was intending to make the top out of a singe piece of wood/plywood but I happened to have two pieces of scrap panel that I could cut down and only "waste" a little bit of wood. I figured it would work as a temporary top and if it doesn't work I'll replace it later.
I had my neighbor - we'll call him Steve to protect his identity - come over and help me lift the saw onto the cart.
It still needs drawers and a table for the saw but at least it is up off the ground and is on a cart that will be easily mobile. I planned on putting adjustable feet on the leg side. I think I am going to wait a while before I put them on though. It seems to sit pretty stable so far.
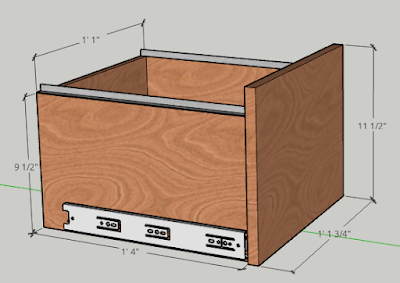
I intended on putting of drawers for a while but then I came across a recycle bin full of accessories for the saw. I don't know when I am going to use them but it would probably be best to keep them with the saw. Maybe I'll add a quick shelf and see if I can fit the bin underneath.
We'll see... For now, it is done.