

I wanted to get a couple of days in the shop this weekend but only got one. I had running around to do on Friday and I'd also slept poorly the night before. Power tools and poor sleep do not go well together and I don't do that. I did however get Saturday afternoon in the shop.
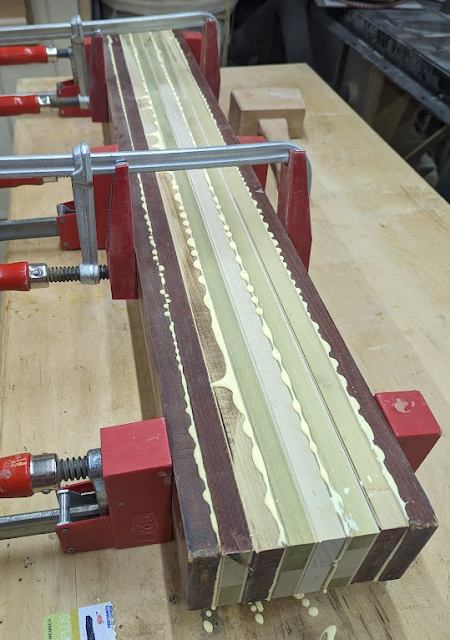
I got most of my parts sourced and rough cut and I got the rails glued up. I also marked out and cut out my outer tall side panel that I will use as a template for the rest of the panels.
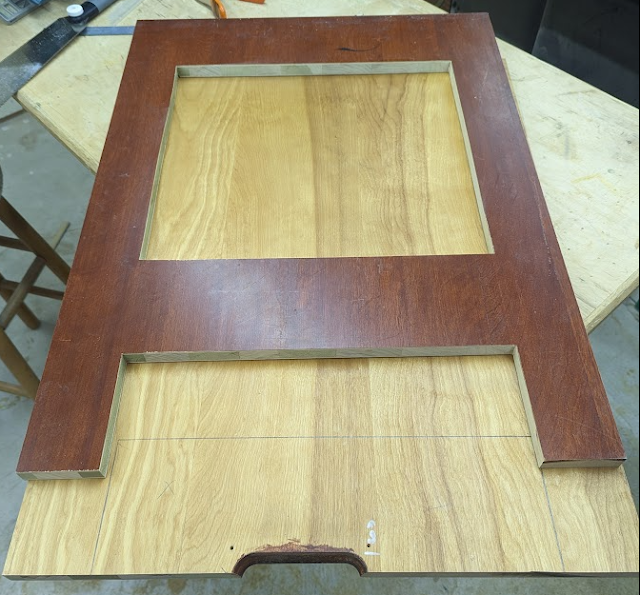
It still needs some work but I got most of it done. I cut out the middle and the bottom using my cordless Makita circular saw. I used my homemade fence to layout and guide it and needed to plunge most of the cuts to get them started. It isn't the most comfortable way to start a cut; however, I am comfortable doing it when I have to. I stopped short of the corners and finished them will a Japanese style pull saw. Some of the corners didn't need more than a light sanding, some needed a file.
I'm trying to decide if I want to drill a pilot hole for the handles or the full hole. If I drill a pilot hole I can just drill the pilot hole into the other panels. It feels like I might be able to drill the holes straighter by hand if I have a pilot hole versus using a Forstner bit to mark the center and then just winging it.
I actually started on my end panels first and then remembered that I needed the rails completed to make sure I cut the notches for the rails accurately. So after getting this far I went and grabbed another couple of my prefinished panels and cut the rails. Since the panels are prefinished I sanded the finish off the backs before gluing them together.
Why am I calling them panels rather than plywood? Well, it is because these aren't really plywood. They are a poplar core with two thick layers of veneer on top. These came out of my father-in-laws barn and I am sure they were scavenged from the garbage from somewhere he was working. Regardless, they were free to me and are super flat. I don't normally put finish on my shop projects but since these panels are prefinished I'm going to leave them as is. I'll just sand off the finish where I need to glue them.
Regardless, this was all my progress this week. I got my rails rough cut and glued together. I got my template panel cut out and cleaned up. (and yes, that was way too much glue on those rails. It was a mess to clean up.)
I think I might print out a 3/4" radius template on my 3d printer this week and use that for routing the corners. I'd thought about designing my own but as people say, "if it's a clever idea someone else probably thought of it first." There are several designs for these on Thingiverse. This is the one I chose.

https://www.thingiverse.com/thing:2438336
I'm trying to decide what I want to model next in Sketchup. I'm thinking about doing the wheels for the cart. I'll have to figure out how to do toroids (donuts).