Showing posts with label Magazine Box. Show all posts

Sunday, December 4, 2016

Magazine Boxes, Part 4 - Finishing

I used my standard finish on all the boxes which is General Finishes Oil & Urethane Satin thinned with Mineral spirits 2:1.

I like this finish because it is very forgiving. I get a lot of open time where I can deal with drips, pools and dry spots. Since the finish is thinned it self levels very nicely and since it is self leveling I can apply it with a rag instead of a brush. This means I can use a disposable shop towel and when I am done applying finish just hang the towel to dry. Once dry I just throw it out in the garbage. This makes cleanup a breeze. The finish cures quickly enough that I get very few dust nibs too.

There are exceptions. Some woods like cherry can end up looking blotchy with just an oil finish on them. Another issue comes up with woods that have a lot of natural oils in them. In these cases the oil in the wood keeps the polyurethane from curing correctly. I don't know of any North American woods that have too much natural oil; however, quite a few imported species do. This is why I always try my finish on an offcut first whenever I'm not familiar with a species.

The fix for both of these issues is to seal in the problem with shellac. Shellac doesn't have the same refraction properties as oil so it doesn't cause blotching and seals the pores so oil finishes put on top don't blotch. It will also seal in issues with oily woods.

I didn't have any oily woods in my magazine boxes but I did want to try sealing the cherry. We - my wife and I - were sending a miniature plinth for a friend that was so oily that we needed to seal it before putting my oil & urethane on it. Since I was going on a trip, my wife volunteered to do share the finishing for me. I have such an awesome wife.

We started by putting shellac on the plinth and the cherry magazine box. I gave the cherry magazine box a very light sanding them started putting the oil and urethane wiping finish on all of them. The downside of the wiping varnish is that the coats are so thin it take a lot of them to get a good coat. I got the first couple of coats before I left on vacation and my wife did the rest while I was out of town.

When I got back from my trip I rubbed the boxes down with kraft paper - brown paper bags - to remove the few dust nibs, filled them with magazines and put them on my shelf.

I'm pretty happy with how they all came out.

New boxes

New and old boxes (from right - Zebra wood, Walnut, Purpleheart, Walnut)


[This was originally posted in December 2016; however, the finishing work was done over the 4th of July 2016.]

Sunday, June 12, 2016

Magazine Boxes, Part 4 - Final joints and assembly

A couple of weeks ago I took a weekend afternoon to cut the final joints in the magazine boxes and glued them up. The final joints went pretty quick since it was just a matter of cutting a number of 1/4" dados and rabbets. It helps that there are only a couple of saw set ups.

My first step is to install a 1/4" dado blade in the table saw. I then clamp a sacrificial fence to my fence which I slide over until it is just touching the dado blade. After setting the blade height to 1/4" I run a couple of test boards through to check my setup.

I then cut the rabbets on the fronts and backs that will hold the sides. These are 1/4" wide by 1/4" deep.

Fronts and Backs
I also run the bottoms through to create rabbets on all four edges.

Bottoms

With my rabbets complete I turned my attention to making the grooves that would hold the bottoms in place. I remove my sacrificial fence and set the table saw fence using the same template I used to shape the feet. This is accurate enough of a method for setting the fence because it is most important to have the grooves all be the same distance from the bottom rather than a specific distance. In the fronts and backs this is a 1/4" deep groove, in the sides it is 1/8". I use scrap to test the cuts and ensure they are the correct depth. I use my template to locate the position of the groove.


All the pieces
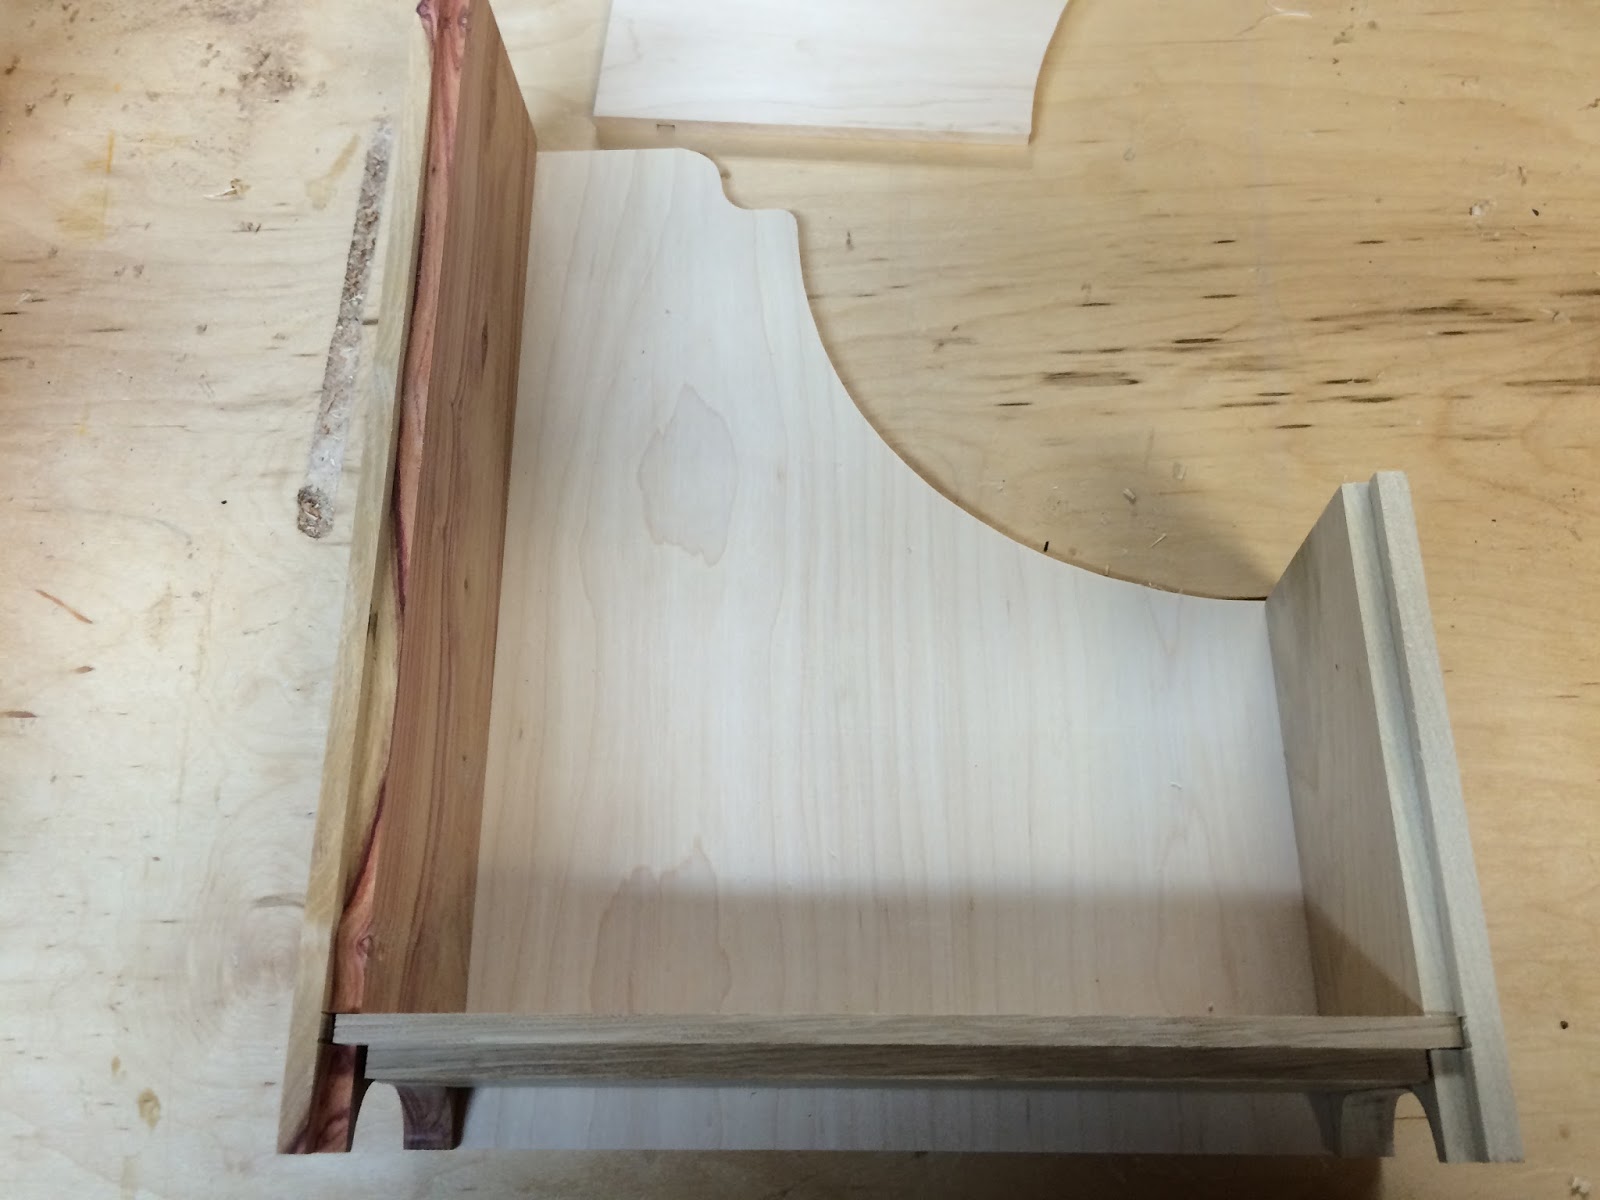
With all the joinery complete it was just a simple matter of gluing up all the pieces. The first thing I did was to dry fit the pieces in order to make sure glue up would go smoothly.

Dry Fit
Often the tongues on the bottoms would be a little thick so I'd use my shoulder plane to shave the thinner until I had a good fit. After I was happy with how all the parts were fitting together I'd glue them up.

Glue up
I used another clamp across the top; however, I took this photo without for better clarity.  After twenty or thirty minutes I removed the clamps and cleaned up the glue squeeze out with a chisel.

The finished boxes got some final sanding and then got move to the finishing room for cleanup.
Assembled boxes (Tulip, Chechen, Cherry, Spanish Cedar, Black Palm)

Next up: Finishing!

Thursday, May 26, 2016

Magazine Boxes, Part 3 - More sanding and shaping

Finish Sanding


I spent a few hours with my random orbit sander on the fronts, and sides. I learned a bit about my new drum sander in the progress. It is set up with 80 grit sandpaper. It does a pretty good job but the consistency isn't great. There must be a couple of large grains somewhere on the roll because the end result isn't perfectly smooth and the pieces have a couple of deep grooves.

I should probably have replaced the 80 grit with a 120 grit but instead I just gave each piece a little extra loving attention with my random orbit sander with 80 grit and everything worked out fine.

Next I used the template to draw the feet on the front and back and rough cut them on the band saw. The next step was to clean up the cuts by using the template and a flush trim bit in my router table. It worked out okay excepting a few pieces where I should have back routed to avoid tear out. A little sandpaper cleaned up most of that.


The next steps are to mount a dado blade in the table saw and cut the grooves and dados in the fronts and sides and the rabbets on the bottoms. Then it's just a matter of gluing up all the pieces and finishing.

I've got a long weekend coming up so hopefully I can get to at least the finishing stage.

Thursday, April 21, 2016

Magazine Storage Box, Part 2 - Sides and Fronts

Templates

Before I dive into cutting the parts I need I start with using a set of templates.


I use the template in the middle both to trace out the sides and then as a template after rough cutting them. The two green templates I use for laying out the fronts. The one on the left is used as a window to see what the final piece will look like after being cut.

And yes, I know I wrote the wrong date on the template. Wood Magazine, October 2009, issue 193 is the correct date and issue.

Magazine Box Sides

I did a pretty good job - for me anyway - resawing the boards for the sides; but, even with that they still needed to be cleaned up after glue up. When I glued the two sides together I'd made an effort to make sure the flat sides were face down and even so after the glue dried I could put them through my planer to get the other side flat. After getting the opposite face flat I started alternating which face I sent through the planer to try and remove an even amount of material from both sides. Once the boards were just over the necessary 1/4" I sent them for a couple of passes through my drum sander.

I used the template of the side to trace out the shape of the sides on all my glued up side panels. I then replaced the 3/4" blade in my band saw with a 1/4" blade and cut them all to shape.


I next used double sided tape to hold the template to each box side and used my router table and a pattern following bit to clean up the rough cuts.

All that is really left for the sides is to finish sand them and cut a very shallow groove to hold the bottom.

Magazine Box Fronts

It is a little hard to tell in the photo below but the grain in the board isn't quite aligned with the sides. I used the template to select which grain I wanted and marked it on the board.


After marking one side of the front I used my band saw to cut to the line. I then used my jointer to make that one side flat and square. Then cut the front to width.


Most of the other fronts were much easier and I didn't need to go through extra effort of aligning the grain. I was able to straighten one side and then rip to width. The rest of cleaning up the fronts was the normal process of flattening one face on the jointer and then several passes through the planer to get them down to 1/2" thick.

While I was getting the fronts to the right thickness I jointed and planed the bottoms and backs at the same time. The boards I prepped for the backs and bottoms are a mix of quartersawn white oak and poplar. Basically what I had lying around the shop that was of an appropriate size.


The fronts are a variety of woods. From left to right they are: Tulip, Spanish Cedar, Cherry, Chechen and Black Palm. The waves you see in the cedar is just a little curl or quilting. The cherry looks pretty bland in this picture but that's only because it is mixed in with some highly figured woods. It really will look quite beautiful once it has some finish on it.


This weekend I hope to get the fronts, backs and bottoms shaped and sanded and start gluing them together. Then a couple of coats of poly next week and I should be ready to start stuffing them with magazines.

[Edit 2016-04-24 I originally identified the first wood as Cocobolo rather than Tulip]

Wednesday, April 20, 2016

Magazine Storage Box, Part 1 - The beginning

Magazine File Storage Boxes

I've been getting and reading woodworking magazines for about fifteen years now. To be honest I read them for the first twelve or thirteen years and then I had a hiatus of a few years while I also wasn't doing a lot of woodworking. I periodically go through my already read magazines and index them. Basically any article or project that caught my eye gets put into a spreadsheet so that I can easily find it later.

After I index the articles I care about out of a magazine I put into into a Magazine File Storage box and put it into my library. Unfortunately I've built up quite a backlog of magazines I haven't indexed yet in addition to the ones I haven't read. About six years worth. Over the last couple of weeks I've gone through all the magazines I've read but not indexed and added them to my spreadsheet. I've got a couple of cardboard magazine storage boxes but I prefer the wooden ones I make from a plan I got a number of years ago.

Whenever I want to work on a project I'll make a photocopy and work from that to keep my magazines nice.  Since I'd made these magazine boxes I already had a photocopy and I knew I'd just seen them in my workshop. And thus began the search for the plans. 

The Search

First I scoured my workshop. They weren't there.

Then I checked to see if I'd brought them upstairs to read. Nope, not there either.

Maybe they were in the workshop, maybe if I did a more thorough search. Nope, certainly not there.

Maybe Google knows? I've found lots of things using Google but this time was a complete strike-out.

Well, they had to come out of one of my magazines. Maybe they were in my index. Nope, nothing in my index?

Well, I've only gotten half a dozen different magazines over the years so the plans had to come out of one of them. Maybe I could find them using on-line indexes? Wood Magazine? Horrible index and no dice. Popular Woodworking? Nope! ShopNotes Magazine? Nope! Woodsmith Magazine? Nope! Fine Woodworking Magazine? Nope! Woodworker's Journal? Nope!

Gah! I may also have uttered - or shouted - some profanity at this point.

Fortunately I had templates left from the first batch I'd made hanging on my wall. I remembered enough of how they were constructed, plus the ones I already had, plus the templates I should be able to replicate the plans. They really are pretty simple.

Looking at the templates I realized that whatever magazine they came out of provided full-sized templates for parts of the boxes. Hey, the only magazine I get that regularly provides full-sized templates is Wood Magazine! So back to the Wood Magazine on-line index. 

I found one magazine storage box plan but not the one I was looking for. If it weren't for the full-sized templates I would have thought I was crazy. I must admit I did entertain the thoughts that crazy was an option for awhile.

I usually prefer an elegant approach to problem solving; however, at some point brute force is the most elegant option available. I figured I'd just pull my magazine boxes with Wood Magazines and go through them looking for the plans. I pulled down two boxes and went through all of them and guess what? No plans!!!!

Gah! I may have doubled down on my soft utterances  of profanity.

My afternoon was slipping away. I'd planned on being at the lumber store hours ago and I still didn't have my plans. Then while I was preparing to just go ahead and go buy the lumber I wanted I saw another few boxes of magazines on my science fiction bookshelf. Hooray!

At last, at last! I found my magazine with the plans. It was in Wood Magazine, Issue 193, October 2009, the third from the end. Hooray!

I made a quick run to the lumber store to pick up some maple for the magazine box sides then cleaned up for dinner with friends.

Starting with the Sides

As I said earlier, these boxes are really pretty easy to make. There are two sides made out of maple that need to be a little smaller than 10"W x 13"L x 1/4"T. The tall front face is made from whatever nice looking wood you have lying around. The back and bottom can be made from whatever scrap you have lying around.

I started by cutting my maple boards into 13" lengths. I then straightened one side on my jointer then since my band saw's maximum height is 6" I ripped them down to 6" or slightly less.


I have had mixed results from resawing boards in the past but these went pretty well. I started by setting up the saw by mounting a 3/4 inch blade. I also added my resaw fence which is basically a tall point fence that allows me to change the angle of the board so that I can counter blade drift. 


The board sitting crosswise in the back is just there to hide the background clutter. This is what it looks like when resawing.


I spent a few hours resawing the boards. and ended up with a bunch of thinner boards.


Inevitably the boards warped as they were cut but not too badly. The next step was to pass them over the jointer to remove the blade marks and make the boards flat again, at least on one face. Once one face was flat I glued them up to make the blanks for the sides.


The picture on the right shows some of the cool things you get when you resaw a board. This is called bookmatching. After resawing the board you open it like a book and you get a mirrored grain pattern. I actually glued these two boards together on the other side so I could avoid the knot holes; however, this picture shows the bookmatching effect very well.

Current State

Since I didn't feel like using 40" clamps to glue two smallish boards together I had a fair bit of time while waiting for my glue to dry two sides at a time. I used this time to dig through my stack of off-cuts and other boards I'd bought special for this purpose and selected enough to make fronts, bottoms and backs for all the sides I was gluing together.


The next step is to shape the sides, cut the fronts, bottoms and backs to size, cut some dados and rabbets and then glue it all together. Simple, right?