Thursday, December 7, 2017

Medal Stands

I think I've mentioned previously that my wife paints little metal figures and that she's pretty good at it. She enters competitions now and then and wins medals. We have a display cabinet where she puts her winning pieces and whatever award she got for it. ReaperCon gives out these cool medals on a ribbon; however, they're round. There isn't a convenient way to display them next to the piece they were won for.

Woodworking to the rescue!

I wanted the stands to not overshadow the medals; however, I also want them to be interesting to make and to show off whatever wood they were made from. I decided the if the face to sloped towards the back and I could use bronze pins to hold the medal in place. To make it interesting I decided to slope the back face and to keep the stand more hidden I'd round the back which would round the top edge too.


I used TinkerCad to work through some ideas and the above image is what I came up with. It's kind of hard to make out in the static image but it was good enough for me to wrap my head around the concepts I wanted in the final medal stand. My next step was to rough out a prototype.


When I made the above prototype I grabbed some red oak out of my scrap bin that was relatively thick. As you can see I aligned the wood grain with the back of the stand. I did this about a year ago; however, I think I just used my band saw to cut the front and then cleaned it up on my belt sander. I curved the back by trimming the corners on the table saw then after clamping the block to my work table I used my hand plane to refine the curve.

Satisfied with the Alpha prototype I went to my local hardwood store and bought a large block of walnut. I cut a piece off the end to make my Beta prototypes. These would be made to the final size I was aiming for. I did make a plywood template to help me trace the outline.


It looks pretty good but it isn't exactly what I was aiming for. But hey, it was just another prototype. It was nice enough that we went ahead and finished it with spray shellac and gave it to one of Jen's painter friends.

We were in lull during our dining room remodeling and I decided to take my big chunk of black walnut and make more stands. Jen wants hers and her friend - let's call him Rex to preserve his anonymity - wants a few more too. I started by using my template to see how I get holders out of my block of wood.


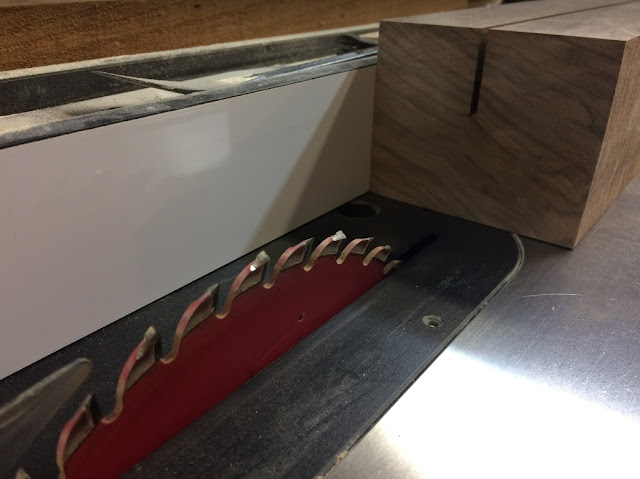
I don't remember if I planned it this way but I can split my block in half and get seven or eight out of each side. I split the block using my table saw.


I then used my compound miter saw to divide one half into sections big enough to get two stands out of. My 12" miter saw was only able to cut the block because it fit between the arbor and the fence.


Then I used my band saw to split the two stands apart. I then roughly cleaned each stand on my stationary belt sander.


If you look closely you can see that the sanding marks are going horizontally across the face. That's because the only flat surface perpendicular to the face. If I tried using one of the other surfaces I'd probably ruin most of the pieces by sanding them unevenly. Those scratches will clean up with some finish sanding.

There's just a couple of steps left: drilling peg holes in the front, rounding the back, finish sanding and finishing. Depending on how the dining room goes, maybe I'll get to it this weekend.

Here's the templates to make your own.

Sunday, November 26, 2017

Workshop Makeover, part 22 - Dust Collector Closet - Painting, Venting, Collecting


A few weeks ago my friends (Robin and Will) stopped over to help with tearing up the carpeting in my dining room. That's barely a job for two people much less four so I figured Will and I could work on my dust collector closet.

Again I may have been a little too ambitious; however, I'd been hoping the two of us could get it mudded and the PVC to collect the dust from my table saw run. Instead it took the two of us most of the afternoon just to do the first coat of mudding. We unfortunately didn't get to the dust collection.


Let me start by saying I understand most of the principles behind a good mudding job, I just have acquired little of the physical skills to execute them. I probably did Will a miss-service in improperly mentoring him in his first drywall experience. Hopefully he's not scarred for life.

In any case over the next week or so I sanded, mudded, sanded, mudded until I figured it was good enough for a basement dust collector closet. This week I primered and painted the closet.


I painted the closet using the leftover paint from my dining room project so it's a blue/grey color. I'm a little better at painting than I am at mudding but not nearly as good as my wife. Regardless, it's a basement workshop closet.

In the back of the closet you can see the vent/filter for releasing the air pressure when the collector is running after I've got doors on the front.


This is a furnace HEPA filter wrapped in a poplar frame. To keep the filter from just blowing out of the frame I put a hinged back on it and used a bolt with the head cut off and a thumb screw to keep the frame shut.


I didn't do any fancy joinery on the front half the frame. Butt joints, glue and a couple of brad nails. Since the back frame isn't going to have the framing to help hold it together I half lapped the corner joints. Since I only had four corners and it was going into my basement shop I just used some scrap to set the height of my regular table saw blade and just made a bunch of passes until it was done. Not furniture quality work but perfectly acceptable for my purposes.

The other thing I did this last week was dry fit the collector piping for my table saw. It kind of winds around through a wall and under my table saw so I wasn't able to get a good picture of it' however, I did get a few adequate pictures.


I had a couple of concerns with getting the placement of the initial hole correct. The outlet is attached to a stud and I wanted to avoid it and the 220V line running down to it. The next stud over was less than 16" since we laid out the studs from the back of the closet when we built the wall. Also the floor wasn't level so I know the bottom plate is not at floor level but is an inch or so high.

I picked what I thought was a relatively safe spot and drilled a pilot hole through the T1-11, then using a stiff piece of wire I poked around to make sure I'd have enough clearance. I used my compass to draw a circle the outside diameter of the PVC and cut out the hole using my jigsaw. I used a half round rough rasp to clean up the hole so the pipe fit tightly.

To get the correct location to make a hole on the inside of the closet I pushed a short piece of PVC through the outside hole, traced the interior diameter on the back of the drywall using a pencil. I then transferred that line to the outside by pushing some wire nails through to the inside of the closet where I could use my short PVC off cut to trace the outer diameter. Then it was  just a matter of cutting it out with  drywall keyhole saw.

At the end of the pipe next to the table saw you can see that I have a threaded connector for dust collection hose. I'd originally planned to make the connection a solid connection; however, it would have ended up costing me another $20 or so in parts and would have meant a lot of fiddle fitting. A foot of flexible hose at the saw won't be too bad and will have the added benefit of giving me a little flexibility, having an easier cleanout and not having to worry about transferring any vibration into my collection pipe.

All in all, I am happy with how it's all coming out. I have the end in sight. By the end of the weekend I should have the collector back in the closet and the table saw hooked up. I just need to build my doors and run a couple more collection pipes.


Saturday, November 25, 2017

Dining Room, part 1 - Demo and Flooring Prep

It's Thanksgiving week here in the United States. Traditionally people get together, eat lots of food, play touch football, and sometimes even think about all the good things we have to be thankful for.

My wife and I add home improvement projects to our Thanksgiving traditions. We take the long weekend to kick off medium to large projects. Close to ten years ago we started this tradition when we replaced all the nasty old carpeting in our upstairs bedrooms with hardwood. We completely underestimated how much effort stripping 1000 sq feet of carpeting and laying hardwoods would end up being.

It didn't help that after we started ripping up the carpet we decided we may as well replace the base molding. What was in place was basic bull nose molding and we wanted to upgrade to a nicer colonial molding. Then we thought that if we were replacing molding we may as well replace all the case molding around the doors. Then since we had light weight hollow core doors we were planning on replacing eventually anyway we may as well replace them with solid core 6 panel doors.

And you know what? If you've got all your floors torn up and no molding...  You may as well paint too, right?

That long weekend project took three months to finish but it all looks great now. I may even finish the last of the base molding sometime this decade.

It was a good experience because it taught us to not be surprised when you look under the covers. One of our bedrooms had the carpet padding glued to the floor with a rubber cement. You know, just in case the tacks and gravity both failed. Be kind to the next person doing renovations... Don't glue down your carpet padding. We also found water damage that had been partially covered up and a poorly done patch in the sub floor that needed to be fixed. We also found around a half gallon of playground sand under the padding in one of the rooms. If these kinds of things would bug you, pay someone else to do your renovations, or do them yourself so you can know they're done right.

Since then we've done our living room with Kempas and I did our first floor powder room with some of the leftover red oak.

This year we're redoing our dining room. We've lived here for about sixteen years and the dining room has been the same awful pepto-bismol pink as it was when we bought it. The carpet wasn't too bad when we moved in but sixteen years of cats and people made it pretty gross.

We started demo a few weeks ago with the help of some friends of mine. We'll call them Will and Robin to help protect their identities. Will has started a vocational program for carpentry and I thought he might like some real life hands on experience. Robin is his older brother and is college. He's tagging along for fun.

Heimdall, Idris and Luther in their new playground
This weekend we're going to be laying the new flooring (Tigerwood) and with any luck we'll be putting molding in too. We started breaking out the boxes and sorting the boards by length. You can see the new colors in the next photo too.


Workshop Makeover, part 21 - Dust Collector Closet - Table Saw Wiring

I don't remember what I was thinking when I had my table saw outlet first installed. The box is floating loose which isn't safe.


The power cord also stretches across the only way to get from the front of my shop to the back of my shop. Not only is this a tripping hazard but whenever I roll tools into the shop I have to unplug the saw to get them through. Now that I have the closet completed the best place for the power cord is on the other side of the saw on the exterior wall of the closet. That will keep the power cord under the table saw top extension and out from under foot.

When I designed my initial shop walls I thought I might be making more wiring changes to support new tools down the road. I wanted it to be as easy as possible to add new wiring. Since these walls aren't really load bearing - they aren't holding up the house anyway - I put a wide channel in the back of the studs and putting a plywood backer across it to staple wiring to. Covering all this I put a chair rail that can be removed easily to get to the wiring. To run the wiring to the other side of the shop I'd just need to remove the current box, take the existing wire and run it over one more stud bay and then up to the ceiling. From there I could install a junction box, run a new wire across the floor joists, down the closet wall and into a new box.

Seems simple enough, right? Well, my plan did work out; however, there were a few challenges along the way.

The first challenge was getting the current wire loose. My electrician had done a very quality job putting the wiring in and had stapled the existing wire to the stud. I was going to have to remove the T1-11 panel below the chair rail to get the wire loose. Fortunately I'd used deck screws to put up the T1-11 so it was just an issue of pulling a dozen or so screws that had been painted over.  Unfortunately after pulling the screw I realized both sides were trapped. The right side by the adjacent T1-11 paneling the left side by trim around my water closet(*).

The T1-11 came out with a little flexing of the panel, some prying and a lot of grunting.

With the panel removed getting the wire loose and into the next stud bay was easy. Getting it through the top plate a little less so. There was barely enough room to get a drill and a spade bit between it and the floor above. It wasn't pretty but I got the hole drilled.

With the hole drilled I used my wire fish to pull the wire up through the hole and into the junction box I'd fastened to the floor joist.

The closet side was much easier since the wall cavity was still open. I could get to the bottom of the top plate and drill a hole up through it. Then it was just a matter of running a wire from the box through up the wall and through the hole and then across the floor joists to the junction box.

All that was left was tying it all together, black to black, white to white, ground to ground.


(*) My water closet isn't a water closet in the British sense. The main water line for my house comes in through my workshop. Since I really don't want to break it by accident and flood my workshop. That would be unfortunate. I built a closet around the pipes to protect them.

[I did this work back in May...  Just getting back to blogging and found this one unpublished in my queue.]

It's woodworking season again!

The weather outside is cold, dreary, rainy, dark...  just plain yucky.

So what have I been doing all summer? Well, stuff... Some outdoorsy stuff, some indoorsy stuff. I did keep a few woodworking projects moving over the summer but not too much.

I bought a Harbor Freight 4'x8' folding trailer this summer. What's the big deal with that you ask? Well, since I traded my Silverado in for a Forrester I've not had a good way to get plywood home from the lumberyard. The Harbor Freight trailer was such a good deal. It's normally a $400 trailer but I got it on a better than normal sale. Great price, I just had to put it together.

I may have picked a poor day to start putting it together. I started bolting it together in my garage and part way through I started not feeling well so I laid down on the concrete to try and cool off some. I figured it was just a matter of having a typical software engineer physique. Turns out it was a 93 degree Fahrenheit day in Upstate NY in October. Set a new record high. <sigh>

Anyway, over a couple of weeks I got it put together, learned how to grease trailer wheel hub bearings and how to wire a trailer. All of these things are easier than you might think if you haven't ever one it before.

This last weekend I bought a sheet of 3/4" PT plywood to deck it with. Adding the plywood decking was quite annoying. The first step was to use a spade bit to make recesses for the bolt heads sticking up through the frame. That went pretty well except for needing a few tries to get everything lined up right.

The directions called for using 3/8" cross head bolts to fasten the decking to the trailer except I couldn't find them in my Home Depot. I substituted carriage bolts and they seemed to work out well enough. The most annoying part was trying to get the bolt holes in the decking in the right place. What I found worked for me was getting a couple of bolts in place then folding the trailer so I could work on each half vertically. I drilled a hole in about the right spot then when I figured out where the hole was I'd angle the drill bit to get it through the hole in the frame and then straighten the drill. So some of my holes are slightly elongated but I don't think it'll matter in the long run.

What else did I do over the summer? Well, I flew to Chicago to pick up my dad then drove to Carbondale, Il to see the eclipse. How was it? Well, I laughed, I cried, it was better than cats.

We experienced about two and a half minutes of totality; however, unfortunately a cloud occluded the sun for about two minutes of it.


Very sad but at least I had the presence of mind to take a picture of what I could see of the 360 degree sunset. In the panorama below, there's about 20 minutes between the two photos, the lower showing a chunk of the 360 degree sunset during totality.


Regardless  I got to spend a long weekend with my father and 100 or so new friends from Astronomy Cast's fans as well as Fraser Cain and Pamela Gay.

And now! Back to woodworking season!


Saturday, May 13, 2017

Workshop Makeover, part 20 - Dust Collector Closet - Dust Collector

I had a little bit of time Friday night before having to cook dinner and and play Mass Effect 3 for the evening so I cleaned up construction debris and moved my dust collector into the closet. There was just one complication - so far - which is that the bag supports are taller than the ceiling in the closet.


This wasn't a surprise, I'd been planning on it. Step one is to remove the supports from the collector. Fortunately the arm is segmented and the upper arm can be removed. I unhooked one top bag and checked how the bolts are connected on the inside. I was afraid there'd be nuts on the inside and if I just unscrewed the bolt the nut would be lost in the sawdust bag. Turns out there's no nuts, the plenum has threaded holes.

I started by loosening both bolts and then removing the top one.


This allowed me to spin the arm to the side, reinstall the top bolt, remove and replace the bottom bolt and voila! Bob's your uncle!


Then I was able to move the entire collector into the closet and best of all, it fit. It's a little tight but that's okay. I'm pretty sure the dust collector isn't claustrophobic.


The bags shouldn't be allowed to collapse entirely because they might bind up or snap when inflating. That's what those support arms I removed were doing. I was originally thinking of using eye bolts and carabiners but then decided it would be easier to just run a string the length of the closet.


In the picture I'm using some paracord I had lying around. I didn't like the way the bags hung on it so today I replaced it with some heavier rope (not pictured here). I still need to rotate the bags so the bags hang straight but I'm not too worried about it for now.

I put the garbage can cyclone into the back corner.


The picture doesn't have the cyclone cover or hoses. I still need to trim one of the hoses shorter so that it fits better. I'll get to it eventually; however, since I haven't run any of the duct work yet there is no rush.

Thursday, May 11, 2017

Workshop Makeover, part 19 - Dust Collector Closet - Ceiling

As you saw in my last post I made pretty good progress putting up the blue board. I want to get all the blue board up this week so I can start using the closet. The last big piece is the ceiling; however, I made no plans for how to support drywall. Typically there'd be joists sitting on top of the walls that ran the length but I didn't leave room for them. I also have minimum head clearances already and so didn't want to drop the ceiling more than I had to.

Since it isn't a very big room I don't have to worry about a lot of weight hanging from the joists. What I did was after adding the last couple pieces of drywall near the ceiling I hung two 2x4s flat by toe nailing them into the top plate in the back and the header above the door. To get support next to the walls I screwed 2x2 cleats to the wall. Since I hadn't been planning on doing this I didn't have spare new 2x4s so I reclaimed some of the wall studs that I'd ripped out of the previously existing wall. They are garbage and the ceiling is probably going to look bad as a result but hey...  It is a closet in the basement meant to hold a dust collector.


To get my drywall home in one piece in the back of a short bed pickup I purchased a random piece of plywood. It wasn't a very good piece of plywood but I was in too much of a hurry to dig through the stack for a less bowed piece. I ended up using a chunk of it across the back of the closet. Since I screwed it into the joists it's going to give them a fair bit more support. It'll also keep things from whacking the back side of the ceiling drywall.

I suppose I could have come up with some braces to hold the drywall to the ceiling while I screwed it in place...  or ... I could get my friend to stop over on the way home from work and give me  hand. John stopped over this afternoon and we cut out the drywall for the ceiling and put it in place. It was quick and easy.


I've still got to put some small pieces around the inside of the door but otherwise it is all done or at least the blue board/drywall is done enough for now. I think the next steps for me are:

  • Move the dust collector into the closet
  • Move my table saw outlet
  • Ducting
  • Doors
  • Venting

I'm going to leave the closet without joint compound and paint for a while. I'm going to see how the noise works out. If the noise carries through the central air duct work and is significantly louder I'll take the top down and add some insulation to try and dampen the noise.

Monday, May 8, 2017

Workshop Makeover, part 18 - Dust Collector Closet - Drywall

I had a couple of hours tonight so I figured I'd get started on putting up the blue board.

Before I get any further let me say that I am horrible at drywall. I've done a little patching around the house and it all ended up looking okay but my technique is to make the patch, add mud, sand, ad more mud, sand, add more mud, sand, ad even more mud, sand... It all looks okay when I'm done but I'm no professional. Heck, I think when it comes to drywall I'm not even an amateur. Just keep that in mind...

My walls are 76" high, the side walls are about 60" long and the back wall is 48-1/2" wide. I took a couple of minutes to figure out how to most efficiently use 4 sheets to cover the walls.

The pros tend to put drywall on horizontally, probably partly because they are covering longer walls and they can use 12' sheets that way. Unfortunately I didn't come up with a way to make that work out without having to cut a lot of niggling little pieces so I decided to put my sheets in vertically.

I put the first sheet on the left hand wall from the perspective of the doorway. It was a little tricky getting the sheet in but with a little effort and twisting I managed to get it into place. I also needed to cut a hole for the power outlet which I did after I mostly had it in place. To start the hole I used a spade bit and finished it with my drywall saw.


That went relatively smoothly so I figured I could get another one done before having to make dinner. Unfortunately I'd just barely managed to get the first piece of drywall into the closet and had to use the opening between studs that was now covered up. I fussed with it for a bit then decided it would be easier to just take the back wall off.

I think I forgot to mention this earlier but the entire closet is screwed rather than nailed. I have nails, I have hammers; however, I also have a sore elbow and tendinitis in both wrists. I figured it was a small enough project that using deck screws wouldn't add significantly to the project costs. It worked out in my favor when I needed to remove the back. Six screws, three per side...  zip-zip and the back came off.


Then I remembered that I needed to trim the next piece to 46-1/2" wide rather than use the standard 48". The right hand wall doesn't  have a stud in exactly the right place. When John laid it out he didn't anticipate the post shifting the leading edge of the drywall back. No worries, I left that piece in place to use on the back wall and went and cut another to fit the side wall.

With the last two large pieces of drywall in I reattached the back wall and fastened the two pieces in place.


That's as far as I got before it was time to eat dinner. Tomorrow night I'll use the off-cuts to patch the remaining gaps and cut the piece for the ceiling. If I get lucky I'll have time to add the framing for the ceiling as well. We shall see.

Workshop Makeover, part 17 - Dust Collector Closet - New Walls

It's the end of the weekend and while I didn't make quite as much progress as I'd hoped I did pretty good.

I spent Saturday prepping the work area. This entailed

  • Removing the last of the drywall that would have ended up inside the closet
  • Moving the last of the shelf debris into the garage to go out to the curb with the garbage
  • Widened the opening where the closet was going in
  • Swept the floor clean of sawdust and drywall dust
  • Moved cabinets to back corners of the shop to get them out of the way
  • Cleared the tops of my table saw and workbench so they could be used for wall building
  • Moved the lumber for the walls from my garage to my workshop
  • Did final measurements and made plans for how to lay out the walls

That's a lot of bullets but it only took me four hours or so to get all that done. It left me in a good spot to hit the ground running when my friend came over to help raise walls Sunday morning.

Let me say that working with 'John' was great. We got done in three hours what would probably have taken me a couple of days. Having someone who knows what needs to be done who can work independently is awesome. While I was cutting the sole and top plate to length he'd be bringing over more 2x4 studs. While I was cutting  the studs to length he'd be laying out the locations of the studs on the floor and ceiling plate. I know John knows how to use all the tools in my shop properly and safely.

We started the day by going over my plans and getting John's approval. Okay...  I didn't really need his approval but since he's worked in construction previously and has a lot of experience I'd be a fool not to seek his opinion. And while my 'fool' status may be debatable, I do believe strongly in relying on other people who have more experience than I do. The basic plan was to:
  1. Cut the existing wall top and bottom plate to length
  2. Double check the closet depth
  3. Build the short side wall
  4. Build the long side wall
  5. Build the back wall to fit
  6. Build a door frame
John approved of my plan so the first thing we did was cut out the existing top and sole plates where the closet was going. I learned something new: using a circular saw over your head is annoying. All the sawdust falls in your face. Next time I'll use my sawzall.

With the sole plate out of the way we were able to pull my dust collector into the opening and double check my measurements. And, it is a good thing we did. I'd based my measurements off the base - partly because it was easier - but the dust collector is a bit wider in the middle than it is at the bottom. Simple enough to add a few inches to make sure it'll fit.

We started the construction by building the short wall extending the existing wall. It was a great place to start because it was small and quick to do and we were able to get used to working with each other again. Since the existing wall didn't end with a stud we had to add a couple scabs to fill the gap and give us something to screw to.

The longer wall has some complications. Mostly that pesky post needed to be worked around. Fortunately with some careful measuring and thinking we decided we could just notch the bottom and top plates and surround the post with studs. I made the notches with my jigsaw The rest of the wall was pretty standard.

After getting the two side walls built we built the back wall to fit between then added some framing around where I am going to build a door.


The doorway header is a pair of 2x4s with some 1/2" plywood to make it 3.5" wide. It's wedged between the existing wall and the post pretty tightly but I added 2x4 trimmers to make sure it stayed up. Yes it is a pretty lightweight header but it isn't supporting anything so it should be fine. Mostly it is just going to hold up some plywood to cover the I-beam..

There are a couple of pieces of plywood holding the rightmost trimmer in place. I'll probably toenail a couple of screws later but the T1-11 plywood I'll add around the doorway should be sufficient to hold everything in place.


I had planed to put T1-11 siding on the walls but John suggested using drywall as it will slow the spread of fire if somehow I get a fire started in my dust collector. I didn't want to use drywall but mold resistant blue-board will work. I didn't want drywall in my shop because I'm hard on the walls but the closet will be protected from dings. John helped me out again by helping me pick up some blue-board before heading home for the day.

I still need to figure out how to put the ceiling in since I didn't really leave room for joists. I'm sure I'll come up with something.


Thursday, May 4, 2017

Workshop Makeover, part 16 - Dust Collector Closet - Wall Demolition

I had an hour this evening so I figured I'd get a head start on this weekend's work and decided to remove the cabinets and start the wall demolition.

I removed the counter top in two pieces. It didn't require any cutting, the counter was already two pieces that had been stuck together with caulk. I got one small corner and one length. After the counter I started pulling the base cabinets.

The base cabinets came out pretty easy. Just a few screws and then muscling them out. One of the cabinets was pretty beat. I'll have to take a closer look at it to decide if it is worth repairing or if I should just throw it out. With a very cursory inspection the wide cabinet and the narrow cabinet seemed to be in okay condition.

After the bottom cabinets there were just the two top cabinets left. They came out pretty easy as well. I removed all the screws but one from the top of the cabinets and then carefully removed the last screw while holding the cabinet up with one arm. Then I lowered the cabinet to the ground.

On the gross factor, there was mouse feces on the top of the cabinets.

When we moved into the house there was a drop ceiling in the room that became my workshop. It was apparently a race track for mice. When I removed the ceiling it was covered in mouse droppings. The top of these cabinets were apparently part of the track. We've had cats since we've moved in so I know we don't have mice now and haven't for the seventeen years we've lived here.

Anyhoo, I didn't get pictures of the space after the cabinets were removed but it looked good. I'd get pictures now but I cannot. I got all excited and ripped off the drywall and pulled the 2x4 studs.

View from workshop to back storage area

View from back storage area into workshop

Not bad for an hour of work.

Yesterday I didn't get into the shop but I did get some more accurate measurements and made up another set of plans.

BETA plans
I've labeled these plans as 'BETA' because the final construction almost certainly wont match. First off, that 49" back wall is a little awkward. The T1-11 siding is about 48 1/4" so I might narrow the closet to 48" wide. If I move the inside wall (left from this perspective) over an inch that makes the last shelving unit a little awkward (It will have to stretch 49" then). The\ awkwardness with the outside wall (right hand from this perspective) is that half of that wall already exists. To have a flat wall I'd have to shim it.

Either way, my friend "John" who is a woodworker and has worked in construction might come over this weekend. I'll definitely seek his advice. There's four perfectly viable solutions, I just need to pick one and adjust to make things work.

Hopefully by the end of this weekend I'll have the dust collector closet walls raised and paneled. If I'm really lucky we'll fashion some kind of door for the front and have a way to install furnace filters for venting.

Monday, May 1, 2017

Workshop Makeover, part 15 - Dust Collector Closet - Removing Cabinets

It's raining... Nearby towns are flooding; however, I live on top of a hill. Since it was nasty out I had a little bit of time this afternoon so I figured I'd start tackling the cabinets. I know I'd started looking at them last weekend but I hadn't checked inside the cabinets. Turns out the middle two doors of four are part of a single cabinet. The new wall will be going right through the middle.

This isn't too big of a deal. I was going to pull all the cabinets anyway. I'll just have to do more reconfiguration than I was planning. Or perhaps I'll build something custom in their place.

I started by emptying the cabinets. Prior to condensing my shop the cabinets hadn't seen much use; however, after cleaning out the small shop I pretty much filled them up. The upper cabinets held pieces of unfinished - uh, in progress - projects. The lower cabinets had scrap hardwood that I'd thought to be worth keeping. I didn't get rid of anything in this move. I mostly just moved the contents to other cabinets or piled on top of my workbench.

Since I want to reuse the cabinets I wanted to take them apart gently. No sawzall or sledge hammer!

I crawled around inside the cabinets to figure out how the previous home owner had put them together. It took me a couple of minute but I finally spotted where he'd put screws through the frame into the top. In some cases the screws were hidden inside, sometimes they were just straight through the front upper rail. I got all the screws I could find but there was still something still holding the front down.

Turns out there was one sneaky screw I hadn't found. Unfortunately the screw was in a drawer opening where my table saw impinged the drawer preventing it from opening fully. The table saw weighs 600 lbs so moving it isn't really an option. I briefly thought about using a sledge hammer and smashing the drawer out. They're pretty cheap drawers and I wouldn't mind rebuilding them if I reuse the cabinets; but instead, I pulled out the sawzall and cut the screw off with a metal cutting blade. There are other ways I could have accomplished this tasks but this was pretty quick and easy. I love my sawzall. It is probably one of the least used tools in my shop but when it comes to tasks like these it's invaluable.


So okay, maybe a little sawzall.

My blade may have gotten  little hot...  perhaps there was smoke involved... It was new to start.

After getting the last screw it was just  matter of noticing that there was caulk along the back edge and scoring it so the top could be pulled off.


That's where I left it as I had to finish cooking dinner.

Of interesting note I found a couple of cellar spiders in the cabinet. I think they're dead since they didn't move when disturbed but I left them alone anyway. At least I think they're cellar spiders.


In any case, unless there are surprises it'll just a couple more screws holding the cabinets to the wall and I can finish pulling them out.

Sunday, April 30, 2017

Workshop Makeover, part 14 - Dust Collector Closet - Removing Shelves

It's been a couple of weeks with little progress. I wish it was because of all the awesome outdoor stuff I've been doing but alas it is something much more prosaic. My elbow has been paining me since sometime during the basement clean up in January. Stupid weak software engineer physique. Anyhow, after two weeks of rest and some really good anti-inflammatory medications I'm back to working on my dust collector.

I didn't get much time this weekend as I did have other things to do; however, I got a couple of hours of knocking apart the old shelves.


The top row of 2x3s were added by me when I needed auxiliary wood storage. They came down pretty easy since I'd just screwed them in place with deck screws. Zip-zip and they became a pile on the floor.

Unfortunately the person who put up the shelves originally really liked nails. That meant hammer swinging and nail pulling. I did seriously consider pulling out my sawzall and just cutting them out but decided it would be better to knock them apart. It did let me know that my elbow isn't completely healed yet but now I have a nice pile of 2x2s, 2x4s and particle board ready to be taken out to the curb on the next garbage day.


Much better. I'm probably going to discard the 2x2s and some or all of the short 2x4s. There's some utility left in them but not a heck of a lot and they'll take up storage space. Maybe I'll find something to do with them; however, all that particle board and probably the flake board is going to the curb.

I had a little bit of time left so I took a closer look at where exactly the next set of shelves would end. This is important because I'm going to support one side of the next set of shelves with the closet wall. I'll go into more detail on the shelf construction in the next post but figuring out where the inside wall of the closet was going to land allowed me to take a closer look at the space inside the workshop.


The wall is going to come out just to the right of the steel post. That post is also pretty much in line with the wall to the left. Framing around it will be a little tricky maybe but probably not too bad. My woodworking friend who helps me pick up lumber on occasion is was worked construction before so he'll be able to give me tips and suggestions.

I'm definitely pulling the two upper cabinets and the lower cabinets. I think I'll move the lower cabinets back to where my laundry machines are. That'll give me storage for laundry supplies and other household chemicals I don't want just sitting out. It'll also give me a counter top for folding laundry. The upper cabinets pose a bigger question.

I have some shorter upper cabinets to the right of the post that I could replace with the taller ones.


There is a vent there that might make things more complicated but I might just prefer to close it off to help keep dust out of the rest of the house. With the taller cabinets I'd have to readjust my pegboard but that was really just a short term storage solution for the things I pulled off my old peg board. In fact that is a piece of my old peg board that I cut down so no great loss.

Whatever extra upper cabinets I have - short or tall - will probably get moved to the garage.

Next steps:

  • Empty and remove the cabinets
  • Demo the wall
  • Build the closet
  • Finish the shelves


Monday, April 17, 2017

Workshop Makeover, part 13 - Dust Collector Closet

My next project in my workshop makeover series is to build a closet for my dust collector.

Why a closet you ask? Well, my dust collector has regular bags that collector dust sized down to a few microns; however, that still means that some very fine dust still gets through. Basically the very fine dust gets sucked from the tool and then gets sprayed into the workshop air. I wear a dual canister respirator made by 3M AO Safety - I feel those paper masks are worthless - but since I have a beard it doesn't seal perfectly. By putting the dust collector in its own little room I can keep the dust a little further away from my lungs.

It sounds like a great plan. huh?

Well, there are a couple of complications. The first problem is where to put the closet. I don't really want to take any useful space away from my workshop so sinceI haven't solved how to access extra-dimensional space that means bumping out a wall. Wherever the closet goes I need to be able to get into the closet to empty the bags. I also need to take into account where my ducting will run. As a minor consideration I need to make sure the room is vented. It will be sucking in huge amounts of air into the closet and I need to give it a way out.

This last consideration is the easiest to solve. I'll leave a hole in the closet wall or door the size of a HEPA furnace filter. As a bonus, if I can route the air into an area outside my shop I'll be able to put my workshop in negative pressure so air will tend to flow in rather than out carrying dust. Also I think I have an idea of where to put the closet.


There are cabinets there now but that can be fixed. Now I'm hearing the hew and cry, "But that's storage!" Well yes, you are correct; however, it isn't very good storage. The cabinets really aren't sized appropriately for most of my tools and to get to them today I need to walk around the table saw and climb over the dust collection hoses on the floor.


These two factors make them less than ideal. I'd rather trade the utility of storage cabinets for freeing up the floor space my dust collector is currently occupying. Also, with the addition of my new workbench I have plenty of storage in the shop.

The second concern with this space is that just taking the cabinets out will not be enough. I'll need to bump out into the space behind my workshop. This space today is currently occupied by some shelves that were build by a previous homeowner. They are pretty basic and utilitarian. They hold stuff off the ground but I've been wanting to upgrade them for a number of years now. I think I can store all the same stuff I have on them now by purging stuff that I don't need and better utilizing the space with more modular shelves.

Rough diagram of closet and collector

The back wall of the closet will be in a hallway and I can build in my vents there to get the air outside of my shop. Sure it will be venting right by my utilities but I'll have HEPA filters cleaning the air before it leaves.

The location will also be convenient for a direct run along the floor to my table saw and close enough to where it is now to be able to run a couple of drops to the ceiling and miter saw. I'd like to put some floor sweeps in too but I'll have to put some more thought in first. I haven't even decided whether I want to use metal or PVC pipe for the dust collection. (Yes, I know about PVC building a static charge making it possible to trigger a fuel-air explosion with the dust.)

The central beam is low; however, I'll still be able to put a doorway from my shop into the closet so when I need to clean the bags I can keep the dust in the shop an away from the rest of the house.

In actual fact, this blog post is a couple of weeks behind. I actually started the demo of the old shelves a couple of weeks ago and have started building the new shelves to hold all my stuff; however, that's all grist for another blog post later.

Old shelves and corner of sneak peek of new shelves (left side)